Discover how to set up a CI/CD pipeline for web and mobile projects. Learn about source control, automated builds, testing, deployment environments, security, and release automation to improve software quality and accelerate delivery.
How to Set Up CI/CD for a Web or Mobile Development Project
Modern software development requires teams to deliver new features, fix bugs, and improve application performance without compromising quality. However, manually building, testing, and deploying every update can consume valuable time and introduce avoidable errors. This is where Continuous Integration and Continuous Delivery or Deployment (CI/CD) become essential.
CI/CD helps development teams automate repetitive tasks, detect problems earlier, and deliver reliable software more efficiently. Whether you are building a website, a web application, an Android app, or an iOS application, a well-designed CI/CD pipeline can streamline your development workflow.
What Is CI/CD?
CI/CD is a software development practice that automates the process of integrating code changes, testing applications, and preparing or releasing software.
Continuous Integration (CI) means developers regularly merge their code changes into a shared repository. Automated checks, such as code analysis and unit tests, help identify issues before they reach production.
Continuous Delivery (CD) ensures that validated changes are ready for deployment. Production releases may still require manual approval.
Continuous Deployment goes one step further by automatically releasing changes to production when all required checks pass.
Together, these practices reduce manual work and help teams maintain a consistent software delivery process.
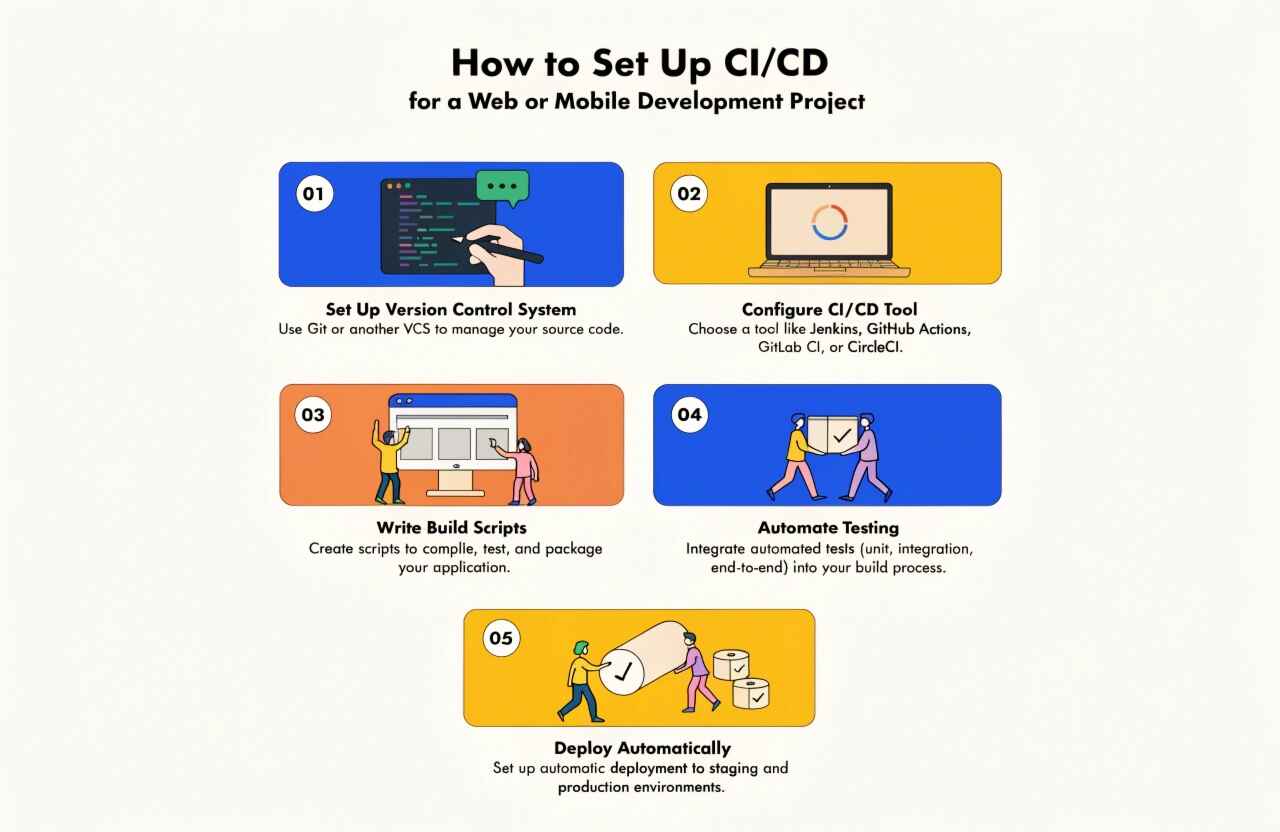
Step 1: Choose Your CI/CD Tools
Start by selecting tools that match your technology stack, hosting environment, and team requirements.
Popular options include:
- GitHub Actions: Automates workflows directly within GitHub repositories.
- GitLab CI/CD: Provides repository management, testing, and deployment automation.
- Jenkins: Offers flexible pipeline automation through a customizable ecosystem.
- Bitbucket Pipelines: Supports automated workflows for projects hosted on Bitbucket.
- Fastlane: Helps automate mobile application builds, signing workflows, and store releases.
For example, a React web application hosted on a cloud platform might use GitHub Actions for testing and deployment. A Flutter application could use GitHub Actions or GitLab CI/CD to automate builds and run tests for Android and iOS.
Choose one tool initially rather than introducing unnecessary complexity.
Step 2: Set Up Version Control
A CI/CD pipeline begins with a reliable version control system. Git allows developers to track changes, collaborate, review code, and restore earlier versions when necessary.
Create a repository and establish a branching strategy that suits your team. A simple approach might include:
- main: Contains production-ready code.
- develop: Integrates ongoing development work, if your team needs it.
- Feature branches: Support individual features and bug fixes.
Use pull requests or merge requests to review code before merging it into the main branch. Configure branch protection to require successful automated checks before accepting changes.
This process helps prevent incomplete or untested code from entering critical branches.
Step 3: Create an Automated Testing Workflow
Automated testing is one of the most important parts of CI/CD. A pipeline that only builds an application may still deliver software containing serious defects.
Include appropriate checks, such as:
- Unit tests: Verify individual functions and components.
- Integration tests: Check interactions between services, APIs, and databases.
- End-to-end tests: Validate important user journeys.
- Code quality checks: Detect formatting issues, suspicious patterns, and potential bugs.
- Security scans: Identify known vulnerabilities and exposed secrets.
Web development teams can use testing frameworks such as Jest, Vitest, or Playwright, depending on their applications. Mobile teams can automate suitable Android, iOS, or Flutter tests.
Run fast checks early in the pipeline. More expensive tests can run later or in parallel where practical.
Step 4: Configure the CI Pipeline
The CI pipeline should automatically run when developers open a pull request or push changes to relevant branches.
For a typical web project, the workflow includes:
- Checking out the source code.
- Installing the required dependencies.
- Running linting and code quality checks.
- Executing automated tests.
- Building the application.
- Publishing build artifacts when appropriate.
For example, a Node.js project might use GitHub Actions to install dependencies, run tests, and create a production build whenever code is pushed to the main branch.
Use dependency lockfiles and consistent runtime versions to make builds more reproducible. Cache dependencies when appropriate to reduce build times.
The pipeline should fail clearly when a required step fails, preventing an unsuccessful build from progressing to deployment.
Step 5: Configure the Deployment Pipeline
After the CI pipeline validates the code, configure deployment to the appropriate environment.
A common deployment workflow includes three environments:
Development: Used for ongoing development and early validation.
Staging: Mirrors production as closely as practical, allowing teams to test release candidates before launch.
Production: Hosts the application used by customers.
For web applications, deployment may involve uploading static files, publishing a container image, or updating a cloud-hosted service. For mobile applications, the workflow may generate signed application packages and distribute them to internal testers or beta-testing platforms.
Use manual approval for sensitive production releases when appropriate. Continuous deployment should be enabled only when automated checks, monitoring, and rollback procedures provide sufficient confidence.
Step 6: Manage Secrets and Environment Variables
Applications often require API keys, database credentials, signing certificates, and third-party service tokens. These values must not be committed directly to source control.
Store sensitive information in your CI/CD platform's secret manager or a dedicated secrets management service.
Use separate configurations for development, staging, and production. Restrict access according to each developer's or workflow's responsibilities.
For mobile applications, remember that values embedded in a client-side application may be extracted. Do not treat an API key or credential included in an app package as secret simply because it was supplied through a CI/CD variable.
Apply least-privilege permissions and rotate credentials when necessary.
Step 7: Automate Mobile App Builds and Releases
Mobile CI/CD introduces additional requirements, including platform-specific build tools, code signing, device testing, and store distribution.
For Android, automate Gradle builds and generate the appropriate APK or Android App Bundle. For iOS, configure the required Apple development tools, signing certificates, provisioning profiles, and build settings.
Flutter teams can automate platform-specific builds through a suitable pipeline, while Fastlane can simplify parts of signing, distribution, and release management.
Start by distributing builds to internal testers. Once the process is stable, automate beta releases and consider production publishing with the necessary approval controls.
Store credentials and signing materials securely, and verify platform requirements before releasing an application.
Step 8: Monitor, Measure, and Improve
CI/CD does not end when deployment succeeds. Monitor application health, error rates, performance, and service availability after each release.
Track useful delivery metrics, including deployment frequency, lead time for changes, failed deployment recovery time, and change failure rate. These measurements can help identify bottlenecks and assess whether automation is improving delivery outcomes.
Prepare rollback procedures so that a faulty release can be reversed or replaced quickly. For mobile applications, rollback may require a corrective release because users can retain older installed versions.
Review failed pipeline runs regularly, remove unnecessary steps, and improve test reliability as the project grows.
Conclusion
Setting up CI/CD for a web or mobile development project requires more than choosing an automation tool. It involves version control, automated testing, secure configuration, reproducible builds, controlled deployments, and continuous monitoring.
Start with a simple pipeline that validates every code change. Gradually introduce staging deployments, mobile build automation, security checks, and production release controls.
With the right CI/CD strategy, development teams can reduce manual errors, release features faster, improve collaboration, and maintain dependable applications as business requirements evolve.
We build scalable web, mobile, and game products for clients worldwide — combining modern frameworks, cloud infrastructure, and best engineering practices.
.jpg)